 Feedback
How to Install Access Panels in Drywall: A Step-by-Step Guide for Contractors
Posted by Best Access Doors on 16th May 2024

Drywall access panels might not grab the spotlight in a construction project, but installing them the right way matters a lot. And that’s why we’ll guide you through the entire process, from choosing the right tools to finishing touches. Let's roll up our sleeves and get into it.
1. What You Need to Install a Drywall Access Panel
Before diving into the installation process, let's ensure you have everything you need:
Tools:
- Measuring Tape: Needed to avoid any misfit between the panel and the wall opening.
- Drywall Saw or Jab Saw: For cutting through drywall with more precision.
- Drill with Screwdriver Bits: Necessary for attaching the panel securely to the framing.
- Level: To ensure your panel sits perfectly horizontally or vertically, depending on the orientation.
- Pencil or Marker: For marking the area on the wall where you will cut out for the panel.
- Utility Knife: Handy for trimming drywall or cutting the paper facing for a cleaner edge.
Materials:
- Drywall Access Panels: They come in various sizes and materials, so choose the appropriate one for your project requirements.
- Screws: These are specific to the type of panel and the wall material you are working with. You should consult the manufacturer's recommendations.
- Joint Compound: For finishing the wall around the new installation.
- Drywall Tape or Mesh: To reinforce joints around the installed panel.
- Paint or Primer (optional): If you must match the panel to existing wall colors.
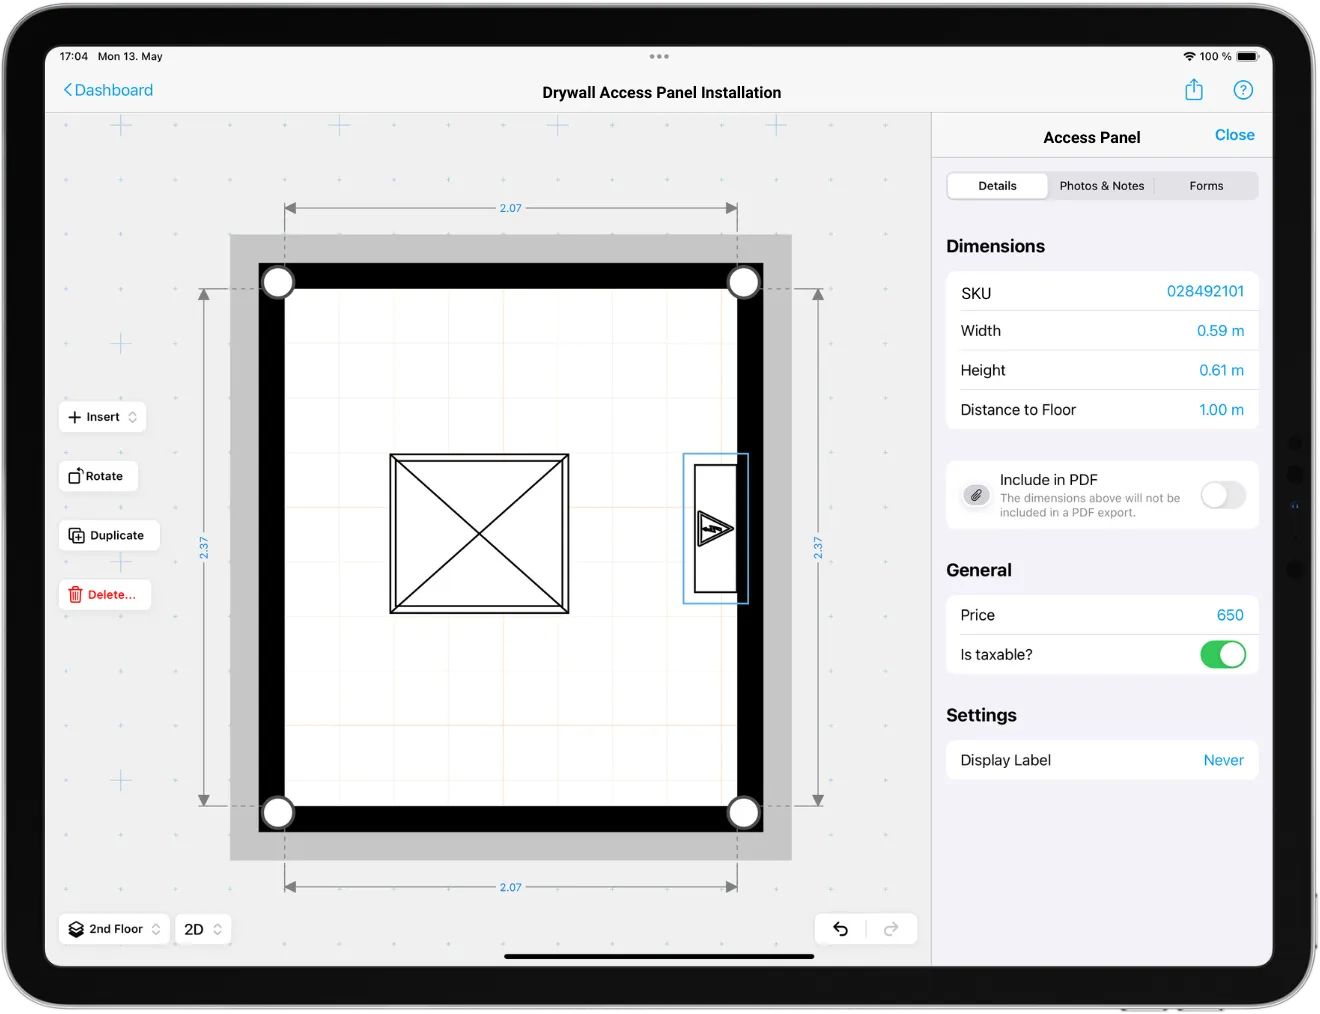
2. Using a Floor Plan App
A floor plan app like magicplan can smooth out your next project's setup process. It lets you quickly sketch out the area you're working on and make sure everything's where it should be before you even start. This kind of prep helps you give your clients a clear picture of what to expect, makes it easier to secure their approval, and speeds up your estimates, helping you secure jobs faster.
Instant Floor Plan Sketching and Cost Estimation
- Load Supplies into Estimator: List all the items required for the job in your app, from the access panel and screws to the joint compound.
- Sketch the Layout: Begin by thoroughly measuring the installation area with your phone using the floor plan app. Include any elements that might be obstacles, such as pipes or wiring, to avoid installation issues later.
- Calculate Quantities: Use the app to precisely calculate the amounts of each material needed, which helps minimize waste.
- Generate an Estimate: Create a PDF estimate directly from the app detailing the costs for materials and labor based on your input. This can be shared immediately with your client for quick feedback and approval.
3. Preparing the Installation Site
Once your estimate is approved and you are ready to start the work, it's time to properly prepare the installation site. This step ensures the process goes smoothly and safely.
Locate the Installation Area
- Choose the Right Spot: Find a section of the wall that provides easy access for maintenance and enough clearance for panel operation.
- Space Check: Confirm there's ample space around the area to work comfortably and for the panel to function without hitting any obstacles.
Measure and Mark the Wall
- Exact Dimensions: Measure the size of the access panel and mark the corresponding area on the wall where the cut will be made.
- Drawing Lines: Use a pencil and a level to mark clear, straight lines for cutting. This helps avoid misalignment.
4. Cutting the Drywall
After marking out where your access panel will go, the next step is cutting the drywall. This phase is critical for a clean installation, so here's how to do it right.
Choosing Your Tool
- Drywall Saw or Rotary Tool: A drywall saw is perfect for manual cuts and works well for small to medium openings.
- Blade Choice: Your blade must be sharp and appropriate for the thickness of your drywall to avoid tearing the paper or chipping the gypsum.
Making the Cut
- Start Cutting: Begin at the corner of your marked outline and carefully follow the lines you’ve drawn. Keep your tool straight to avoid irregular cuts.
- Steady Pace: Proceed slowly and steadily. Rushing can lead to mistakes that might require patching later or, worse, re-doing the cut entirely.
Minimizing Dust and Debris
- Work Area Preparation: Lay down plastic sheeting on the floor and over any nearby furniture to catch drywall dust. This makes cleanup easier.
- Dust Reduction Techniques: If using a rotary tool, consider attaching a vacuum to capture dust as it's produced.
- Safety Gear: Wear safety goggles and a dust mask to protect your eyes and lungs from fine particles.
Cleanup: Once the cut is complete, vacuum up any debris and wipe down the area with a damp cloth to catch residual dust.
5. Installing the Access Panel Frame and Door
After cutting the drywall, the next steps involve fitting the frame and attaching the door.
Fitting the Frame
- Position and Align: Insert the frame into the drywall cutout, making sure it aligns with the edges of the opening. You can also use a level to ensure that it is even both horizontally and vertically.
- Secure the Frame: Attach the frame to the surrounding drywall using screws placed at each corner and along the sides as required.
- Check for Flush Fit: The frame should sit flush against the wall. Any gaps or unevenness can be corrected with a joint compound for a seamless appearance.
Attaching the Door
- Hinge Installation: Attach the hinges to the door panel at the designated spots, making sure they are evenly aligned and spaced. Then, secure the door to the frame by fastening its hinges.
- Test and Adjust: To test its movement, open and close the door several times. It should open smoothly without interference from the frame or floor.
6. Finishing Touches
Wrapping up your access panel installation with a clean finish is key to making it look right at home on the wall.
Apply Joint Compound
- Smooth It Out: Fill the seams where the panel meets the wall with the joint compound. Smooth it out so it's flush with the wall.
- Let It Dry: Give the compound time to dry fully, usually overnight.
Sanding
- Light Sanding: Once dry, gently sand the area to make it smooth. Avoid heavy sanding that might damage the wall.
Painting
- Prime and Paint: Start with a primer if the panel or wall needs it. Then, paint over the panel and surrounding wall to match the existing color. Use a small roller for an even coat.
- Clean Up: After everything dries, take a final look to see if there are no missed spots or uneven areas.
Wrapping It Up
And that’s it—a straightforward guide to installing drywall access panels from start to finish. By following these steps, you'll ensure that every panel is installed correctly, functions well, and looks like it's always been part of the wall.
Share our story - the 2025 version is available